Back when I originally looked at Dataverse’s TDS endpoint, one of the things I noticed was that you couldn’t use the Entity Framework reverse engineering tools to access the data. Thankfully, things have changed!
Tucked away in the “What’s New in EF Core 8” article is the section Reverse engineer Synapse and Dynamics 365 TDS. So let’s give it a whirl!
Reverse Engineering
Most modern samples you’ll see for working with Entity Framework start by building your classes in C#, then having Entity Framework build the database structure for you. In this case we need to go the other way – a process known as reverse engineering or “scaffolding”.
The details in the documentation show how to use the command line tools, but I personally prefer using the excellent EF Core Power Tools by Erik Ejlskov Jensen. Get the very latest version from the VSIX Gallery. This also includes some improvements that aren’t yet available in the main EF Core tools.
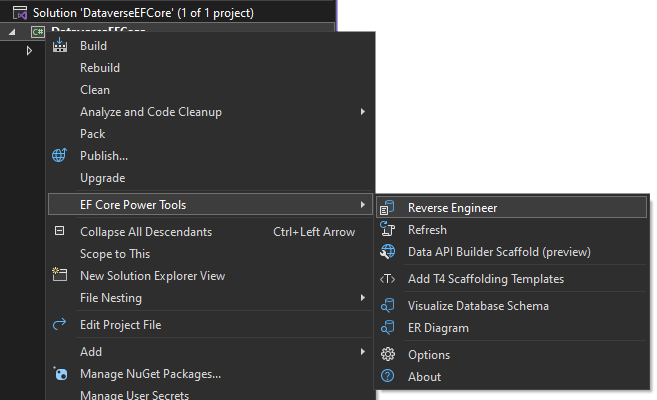
Once installed, right-click on your project and select EF Core Power Tools > Reverse Engineer.
The first time you select this option you’ll get this blank screen to choose the database you want to base your EF Core model on:
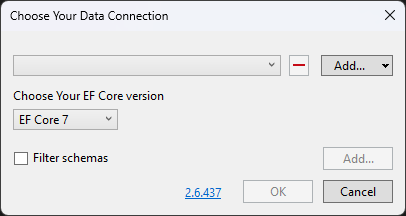
Firstly we need to click Add… > Add Database Connection to be able to enter the details of the TDS Endpoint to reverse engineer:

Enter the domain name of your instance, select “Microsoft Entra MFA” as the authentication method and enter your username. Don’t worry, you won’t have to use MFA to actually run your application, this is only used for initially generating the code.
Enter the first part of your instance name as the database name and click OK to return to the previous screen.
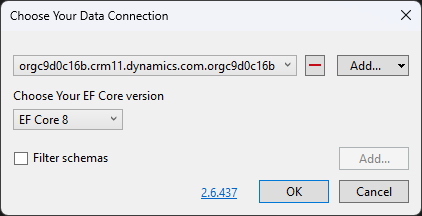
The other important part to set here is the EF Core version. Although Dataverse is only supported in the official EF Core 8 tools, Erik has handily back-ported them to 7 and even 6. The EF Core versions you’ll have available will vary depending on the version of .NET your project targets, but I’d suggest going with whatever is the latest version available.
Click OK and you should first see your MFA prompt, then this window will open to select which tables you want to be able to work with:
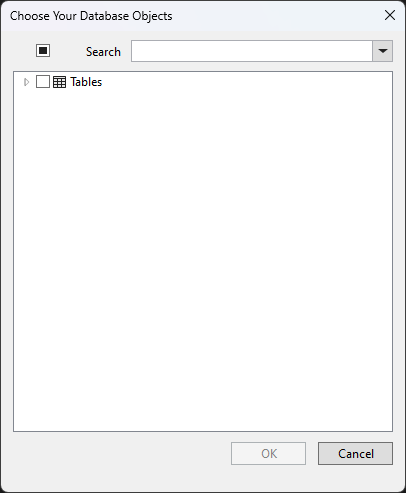
Expand the “Tables” entry, then the “dbo” entry and you should see a familiar looking list of table names.

These are all the Dataverse tables which are available through the TDS Endpoint. Remember that not all tables are available here, particularly the audit table and any elastic or virtual tables.
You’ll also notice that some of the tables have a warning symbol against them. Hover your mouse over one of these and you’ll see the message “This table has no primary key defined”. This is rather misleading as they do have primary keys, but the reverse engineering tools currently do not understand them. This will have a knock-on effect on how we can query the data which we will see shortly.
⚠️ If you use the official EF Core reverse engineering tools, or an earlier version of the EF Core Power Tools, you’ll see this warning for every table. Make sure you’re using at least version 2.6.482.
For this simple test I’m just going to work with the account and contact tables, so tick these and click OK. You’ll now get a screen to control more options about exactly how the model classes get generated.
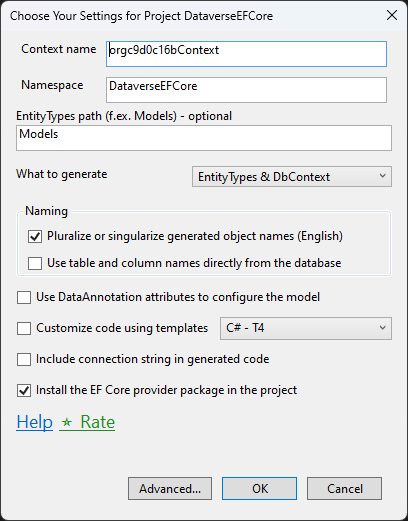
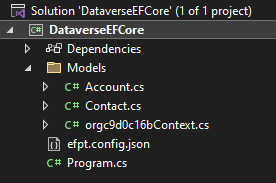
I’m happy with these defaults, so click OK and in a few seconds a “Models” folder will appear in your solution with the classes that have been generated based on the database.
Setting up the connection
Now we’ve got the classes generated, we need to be able to start using them from our app. This is a simple console app so we can set up a single instance of the database context using code like:
var builder = new DbContextOptionsBuilder<orgc9d0c16bContext>();
builder.UseSqlServer("Server=orgc9d0c16b.crm11.dynamics.com;Database=orgc9d0c16b;Authentication=Active Directory Interactive");
var ctx = new orgc9d0c16bContext(builder.Options);
An important part to work out here is how your application is going to authenticate to Dataverse. Here I’m using the Active Directory Interactive method, which prompts the user to log in. If you are writing a service which needs to run without interaction you will probably want to use an application user. I showed how to do this using the underlying SqlClient in an earlier post, and we can reuse the same approach here too. This time though we need to wrap up the logic to acquire the token in an interceptor which will run each time a connection is opened:
class ApplicationUserAuthentication : DbConnectionInterceptor
{
  private readonly string _clientId = "<guid>";
  private readonly string _clientSecret = "<secret>";
  private readonly string _aadTenantId = "contoso.onmicrosoft.com";

  public override InterceptionResult ConnectionOpening(DbConnection connection, ConnectionEventData eventData, InterceptionResult result)
  {
    if (!(connection is SqlConnection sqlConnection))
      return result;

    var scopes = new[] { $"https://{connection.DataSource}//.default" };
    var authority = $"https://login.microsoftonline.com/{_aadTenantId}";

    var app = ConfidentialClientApplicationBuilder.Create(_clientId)
      .WithClientSecret(_clientSecret)
      .WithAuthority(new Uri(authority))
      .Build();
    var token = app.AcquireTokenForClient(scopes)
      .ExecuteAsync()
      .ConfigureAwait(false)
      .GetAwaiter()
      .GetResult();

    sqlConnection.AccessToken = token.AccessToken;

    return result;
  }
}

var builder = new DbContextOptionsBuilder<orgc9d0c16bContext>();
builder
  .UseSqlServer("Server=orgc9d0c16b.crm11.dynamics.com;Database=orgc9d0c16b")
  .AddInterceptors(new ApplicationUserAuthentication());

var ctx = new orgc9d0c16bContext(builder.Options);
Running queries
Now we have the connection set up we can start running some queries. Everything is nice and simple if we only need a single table:
var newAccounts = ctx.Accounts
  .Where(a => a.Createdon >= DateTime.UtcNow.AddDays(-1))
  .Select(a => new { AccountName = a.Name });

foreach (var account in newAccounts)
  Console.WriteLine(account.AccountName);
If the tables you selected didn’t have an exclamation mark against them earlier you can also run queries that join the tables like:
var newAccountsWithContacts = ctx.Accounts
  .Select(a => new { a.Name, Contacts = a.ContactParentcustomers.Select(c => c.Fullname).ToList() });

foreach (var account in newAccountsWithContacts)
{
  Console.WriteLine(account.Name);

  foreach (var contact in account.Contacts)
    Console.WriteLine("\t" + contact);
}
However, things get more complicated if we want to join tables that had a warning about missing primary keys. That means Entity Framework doesn’t understand how to join the tables natively, so we have to spell it out in our own code. For example, if we wanted to run a query looking at what plugins are registered we’d have to manually join a few tables:
var pluginSteps = ctx.Pluginassemblies
  .Join(ctx.Plugintypes,
    a => a.Pluginassemblyid,
    p => p.Pluginassemblyid,
    (a, p) => new { PluginAssembly = a, PluginType = p })
  .Join(ctx.Sdkmessageprocessingsteps,
    ap => ap.PluginType.Plugintypeid,
    s => s.Plugintypeid,
    (ap, s) => new { ap.PluginAssembly, ap.PluginType, Step = s })
  .Select(aps => new {
    AssemblyName = aps.PluginAssembly.Name,
    PluginType = aps.PluginType.Name,
    Step = aps.Step.Name
  });

foreach (var pluginStep in pluginSteps)
    Console.WriteLine($"{pluginStep.AssemblyName} - {pluginStep.PluginType} - {pluginStep.Step}");
This works just fine, but it would be much better if Entity Framework could understand the primary keys so it could handle it for us. Maybe in a future version?
We can check the SQL this query actually executes to be sure we’re getting the results we expect, either by inspecting the pluginSteps object in the debugger or adding another interceptor to log the SQL as it’s executed. Here we can see the query:
SELECT [p].[name] AS [AssemblyName], [p0].[name] AS [PluginType], [s].[name] AS [Step]
FROM [pluginassembly] AS [p]
INNER JOIN [plugintype] AS [p0] ON [p].[pluginassemblyid] = [p0].[pluginassemblyid]
INNER JOIN [sdkmessageprocessingstep] AS [s] ON [p0].[plugintypeid] = [s].[plugintypeid]
Limitations
Remember the TDS Endpoint does have various limitations compared to real SQL Server which Entity Framework can’t magically work around. Some to bear in mind:
- Not all tables are available. Only “standard” tables are available – you can’t access tables that are stored outside the main SQL database, such as elastic or virtual tables. Some individual columns also aren’t available where large data has been moved into blob storage.
- The database is read only. If you try to add or change a record you will get a
Microsoft.EntityFrameworkCore.DbUpdateException: “An error occurred while saving the entity changes. See the inner exception for details.” with the innerSqlException: “‘UPDATE’ statement is not supported” - 5 minute timeout. Although the previous 84MB size limit has now been removed, all queries are limited to a maximum of 5 minutes regardless of any longer timeout settings you apply to the client.
Awesome! But since it lack of update support, seems Sql4CdsConnection and dapper is a more practical solution.