You can often add more value to your data by combining it with other sources to produce an enriched data set. By keeping large reference datasets out of the main Dataverse database you can dramatically reduce storage costs. You can then combine them as needed using Azure Data Factory.
Similar to the other technologies I’ve looked at recently, Azure Data Factory supports a range of data source technologies and formats, but for the moment I’m interested in using the CDM format to load data from my data lake.
Processing CDM data in Data Factory
In Azure Data Factory, the first thing I want to create is a data flow. This is different to the Power Platform dataflow I used to load and transform my original data and store it in the data lake. This type of data flow lets me load and transform multiple data sources and save the results in an output file.
Continuing with my theme of looking at email domain data, I’m now going to try calculating whether the email on each of my CRM contacts is from a free email provider or not. To do this I’m going to use Data Factory to load in the contact records from the data lake, combine them with a list of free email domains, and output the result.
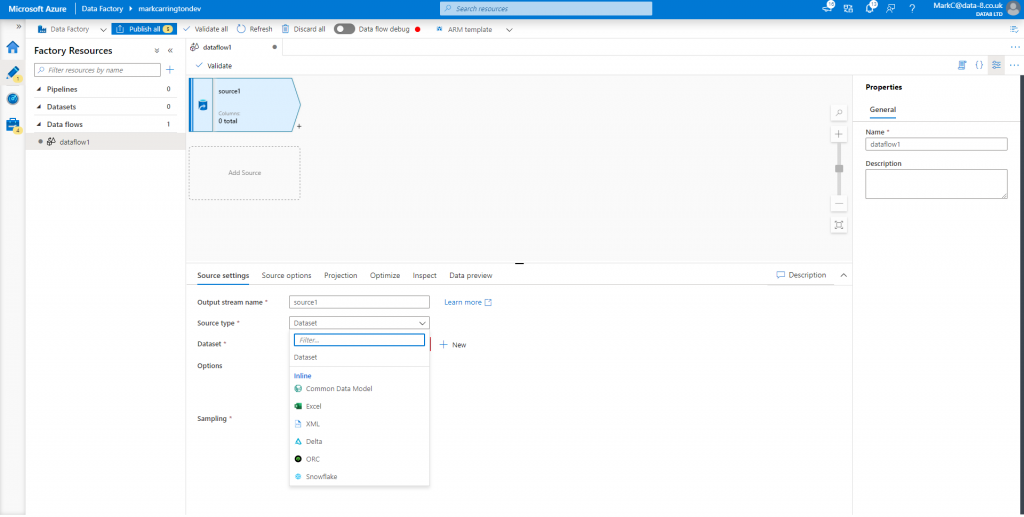
In Data Factory I’ve created a new, blank dataflow and added a new data source. First I need to change the “Source type” to “Common Data Model”:
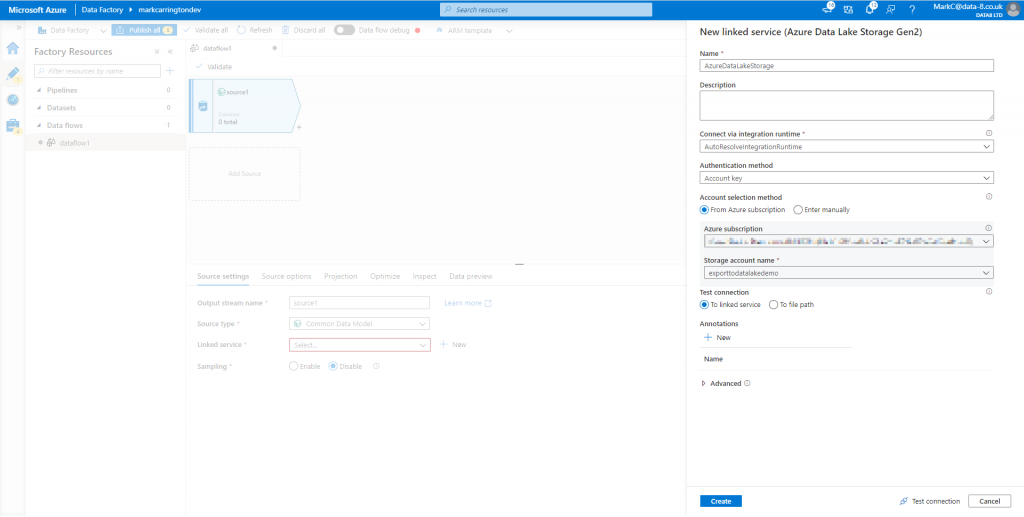
Now it needs another option – the “Linked service”. This is a reference to the data lake that it will load the CDM data from. Click “New” and you’re guided through selecting a data lake account:
Now, under the “Source options” tab, you need to enter the details of where and how the CDM data is stored in the data lake. There are two different formats that CDM data can use, and the CDS Export to data lake feature currently uses the model.json format. I believe though that this will change as part of the 2020 Wave 2 release.
With this format selected there are only a few options to finish configuring. Click the “Browse” button next to the “Root location” option and select the container that the Export to data lake feature created (commondataservice-<orgname>). Finally, type in the name of the entity to load – “contact” in my case.
Loading the schema
The source step is now configured, but it doesn’t yet understand the schema of the data it’s going to load. Until we sort that out, any subsequent steps won’t be able to consume the data it loads in properly. To get the schema, first we’ve got to enable the “Data flow debug” option in the toolbar. This starts up the compute engine in the background that we can work with in the dataflow designer. This can take several minutes to start, so be patient!
Once the debug option turns green, go to the “Projection” tab and click “Import schema”. This will take another minute or so, but then you should see the columns you’re familiar with from CDS:
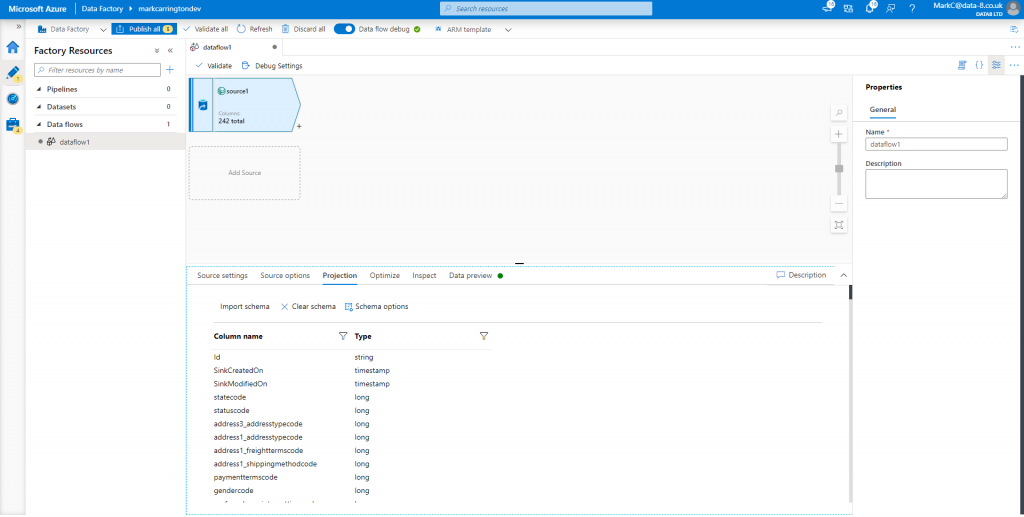
You can also go to the Data preview tab to see a sample of the records it’s loaded.
Loading external data
As well as my contact data from CDS, I also need to load in a list of free email provider domains. For this I’ve downloaded the list from https://gist.github.com/tbrianjones/5992856 and stored it in the data lake. Now I need to add another source to my dataflow. This time I’m going to use the default “Dataset” source type, then click “New” next to the dataset field. This lets me choose Azure Data Lake Storage Gen2 as the data source, then Delimited Text as the format. As I’ve already got a link to the data lake I can select that as the linked service, then browse to select the right file.
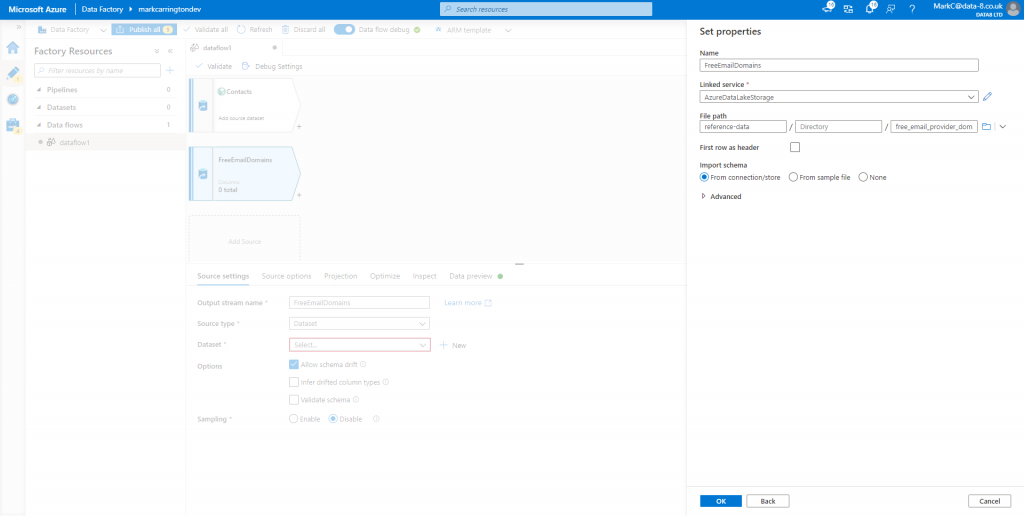
On the Projection tab I just want to rename the column to give it a more helpful name.
Extracting domain name from email
Before I can try to join up these two datasets, I first need to calculate the domain name from the email addresses in my contacts dataset. By clicking the “+” icon next to the contacts source I can add a “Derived Column” step to do this.
This doesn’t use the same Power Query method we saw in the Power Platform dataflows, but a different expression language instead. By clicking the “Open expression builder” link we can use the editor to help guide us through the process of setting this up.
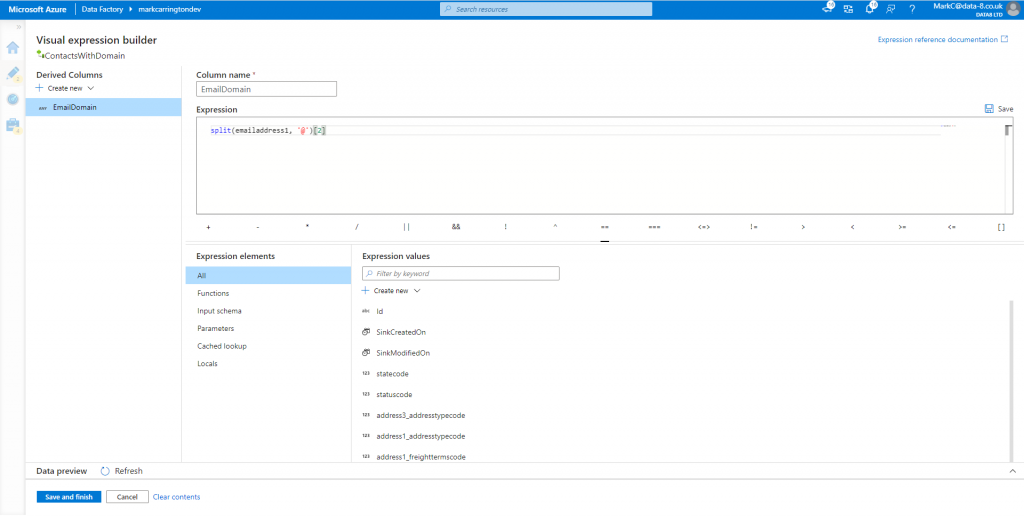
Click Save and Finish to return to the dataflow designer. You can go to the Data preview tab to check that the new column has got the expected values in it now.
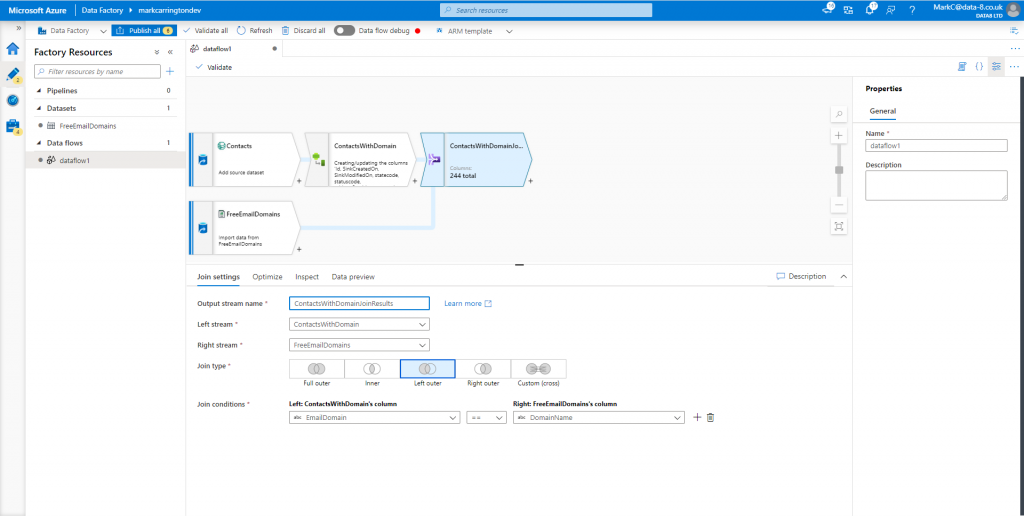
Joining the data sources
Now we’ve got two data sources both with a column containing just a domain name, we can join them together. Add a Join step after the computed column step, select the list of contacts with the computed domain column as the left stream and the list of free email domains as the right stream. Pick the “Left outer” join type to get all the contacts out with the email domain populated where it matched, and pick the appropriate fields to join on from each stream.
This will generate data like:
| DomainName | |
|---|---|
| xxx@data-8.co.uk | NULL |
| xxx@hotmail.com | hotmail.com |
Tidying the output
Before I store this anywhere, I just want to tidy this up to generate a true/false flag against each record rather than a null/non-null value. I can use another derived column expression to work this out:

Saving the result
Finally I can add a “Sink” step to save the results. I want to eventually use this data in Synapse Analytics, and currently it does not support loading data directly from CDM format files, so for now I’ll save it as a simple CSV file.
In the new Sink step, create a new dataset and select the existing Azure Data Lake linked service. Enter the name of the container to save the file into, and an optional directory name. Leave the filename blank though – this will be created for you on each run.
Running the dataflow
Although you can check what a sample of the data looks like at each step of the dataflow using the Data preview tab, I now want to run the whole dataflow over all my data. To do this I create a new pipeline and add a dataflow activity to it.
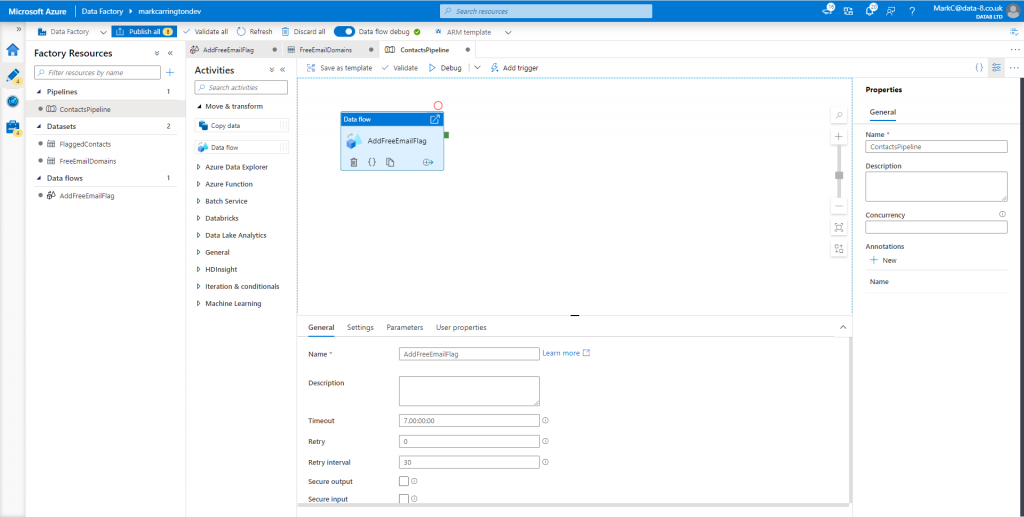
Now I can just click the Debug button in the toolbar to run the dataflow and check everything worked correctly.
Checking the results
Once the pipeline has run we can have a look in data lake to see the results:
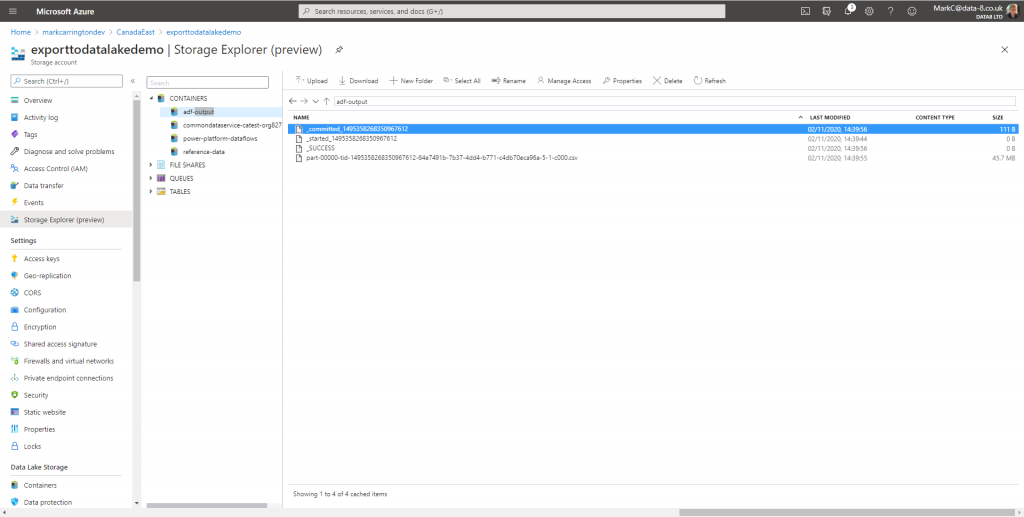
There’s a few metadata files in here to show the progress of the job, but at the bottom there’s our CSV file with all the data in that we can open in Excel to check the results:
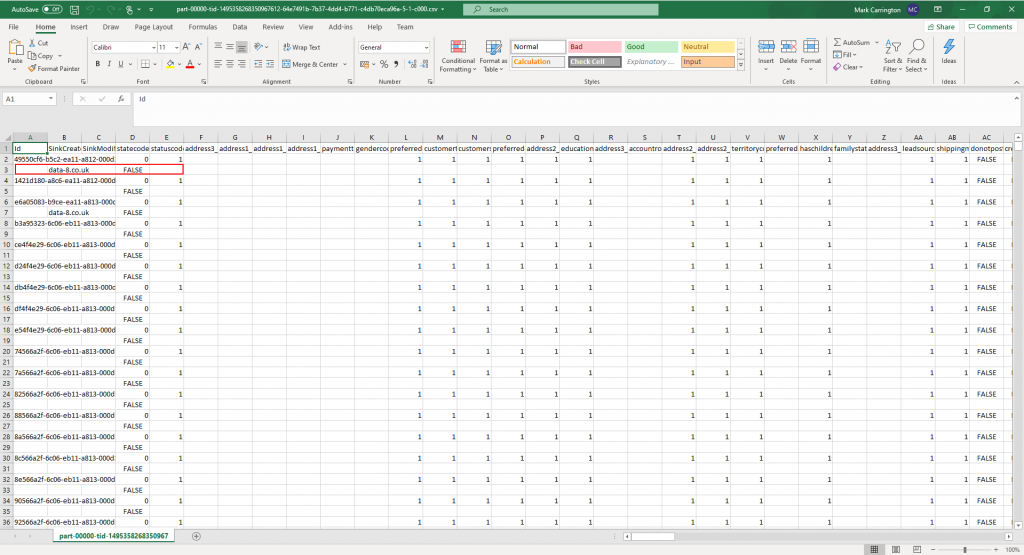
It looks like the new columns have been placed onto a separate row for some reason. Knowing how many ways there are of getting the CSV format wrong, I tried ticking the “Quote All” option on the Settings tab of the data sink step and re-ran the pipeline.
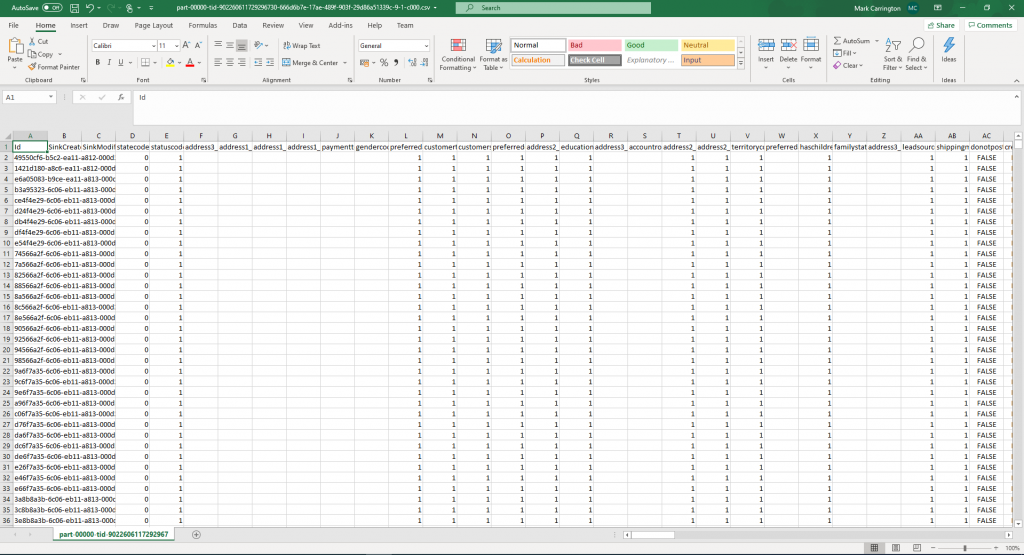
That seems to have resolved that problem, so next time I’ll move on to loading and querying the results in Synapse Analytics.
Bravo, well done!
Don’t suppose you’ve tried bringing in CDM data from Power BI dataflows in ADLSg2 storage. I’ve had no luck so far, it may not be supported yet.
I haven’t tried Power BI dataflows yet, only the Power Platform version. I’m sure I will do soon…